If you want to assign Microsoft licenses to your Azure AD users e.g. Microsoft 365 E3 licenses you can do this with group based licensing as described here. The problem is that even with group based licensing the UsageLocation property for each user must be set individually.
Update: 13.01.2019: Since group based licensing is GA the tenant location is used if no UsageLocation is set on a user object. Use this guide if you want to manually assign licenses or override the tenant settings if you need to configure different UsageLocations.
Possible bulk and automation solutions
You can achieve this with the following options:
- “Manual” trough Azure or Office 365 portal
- PowerShell (must be triggered manually or through scheduled task)
- Azure AD Connect synchronisation (UsageLocation populated in on prem AD)
- Azure automation with PowerShell runbook as in this post 🙂
Azure automation sounds expensive?
Fortunately Azure automation offers 500 minutes of script runtime for free. Find more details under Automation pricing. Just to give you an idea: If the executed script has an average runtime of 1 minute you could run it (500 minutes / (30 calendear days / 1 minute script runtime)) = 16x per day. Each month. For free.
Prerequisites
For the Azure automation solution the following prerequisites must be met:
- Valid Azure subscription
- Permissions to create an automation account and assign Azure AD directory roles
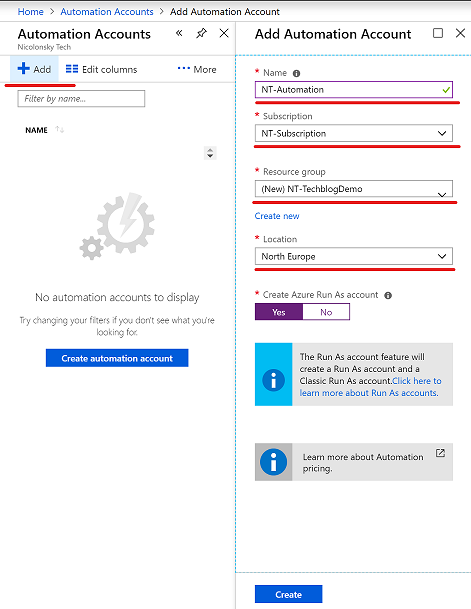
Create Azure automation account
Create a new Azure automation account with your desired naming and location. Important from a functional aspect is that “Create Azure RunAs account” is selected.
Run As Account permissions
The Run As Account which was created with the automation account needs the Azure AD “User Administrator” role. To assign the role we need the “Service Principal Object ID” of the Run As Account (can be found under the Run As Accounts section):
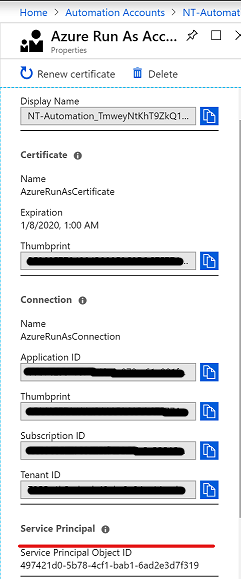
In my case the ID was: 497421d0-5b78-4cf1-bab1-6ad2e3d7f319
To grant the Run As Account the “User Administrator” role we use PowerShell with the AzureAD module on an a Windows client of your choice. To find our Run As account in Azure AD we need the ID as described above.
Add Azure AD module
In order to access Azure AD from the runbook add the AzureAD PowerShell module to your automation account.

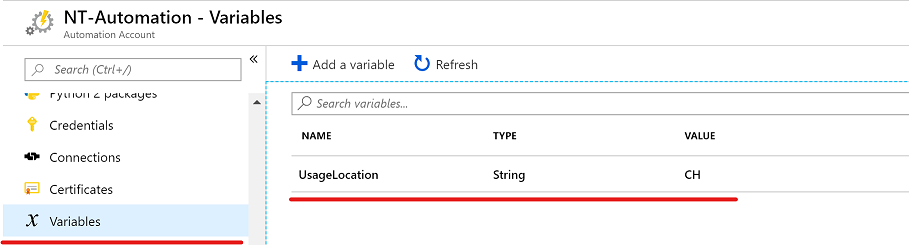
Add variable for UsageLocation
Because we can access variables in an automation account through (PowerShell) runbooks I configured a variable for the “UsageLocation”:
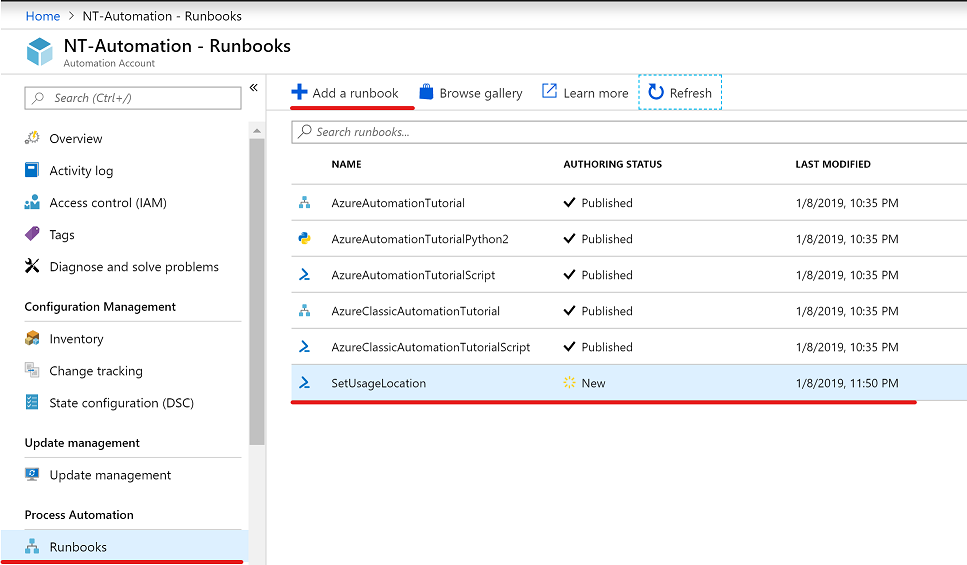
Add the runbook
Last but not least let’s add the PowerShell runbook. Don’t forget to hit the publish button.
With the following PowerShell script we:
- Retrieve the value of the UsageLocation variable from the automation account
- Connect to Azure AD with our Run As Account (service principal)
- Query all Azure AD users which have NOT set the defined UsageLocation
- Set the UsageLocation accordingly
Triggering the runbook execution
The execution can be triggered through a configured schedule or a webhook.

Webhooks
A webhook allows you to trigger the script execution via POST request. The webhook URL contains a security token that allows a runbook to be invoked from third-party systems. This can be useful if your user creation process is automated and you want to execute the runbook automatically after creating a new the user.
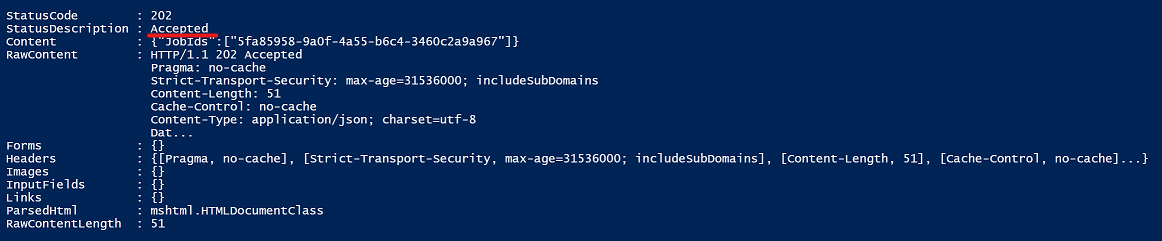
Invoke the runbook with PowerShell:
| |
Excpected response (success):
Time for some action
To see the runbook in action use the test pane:
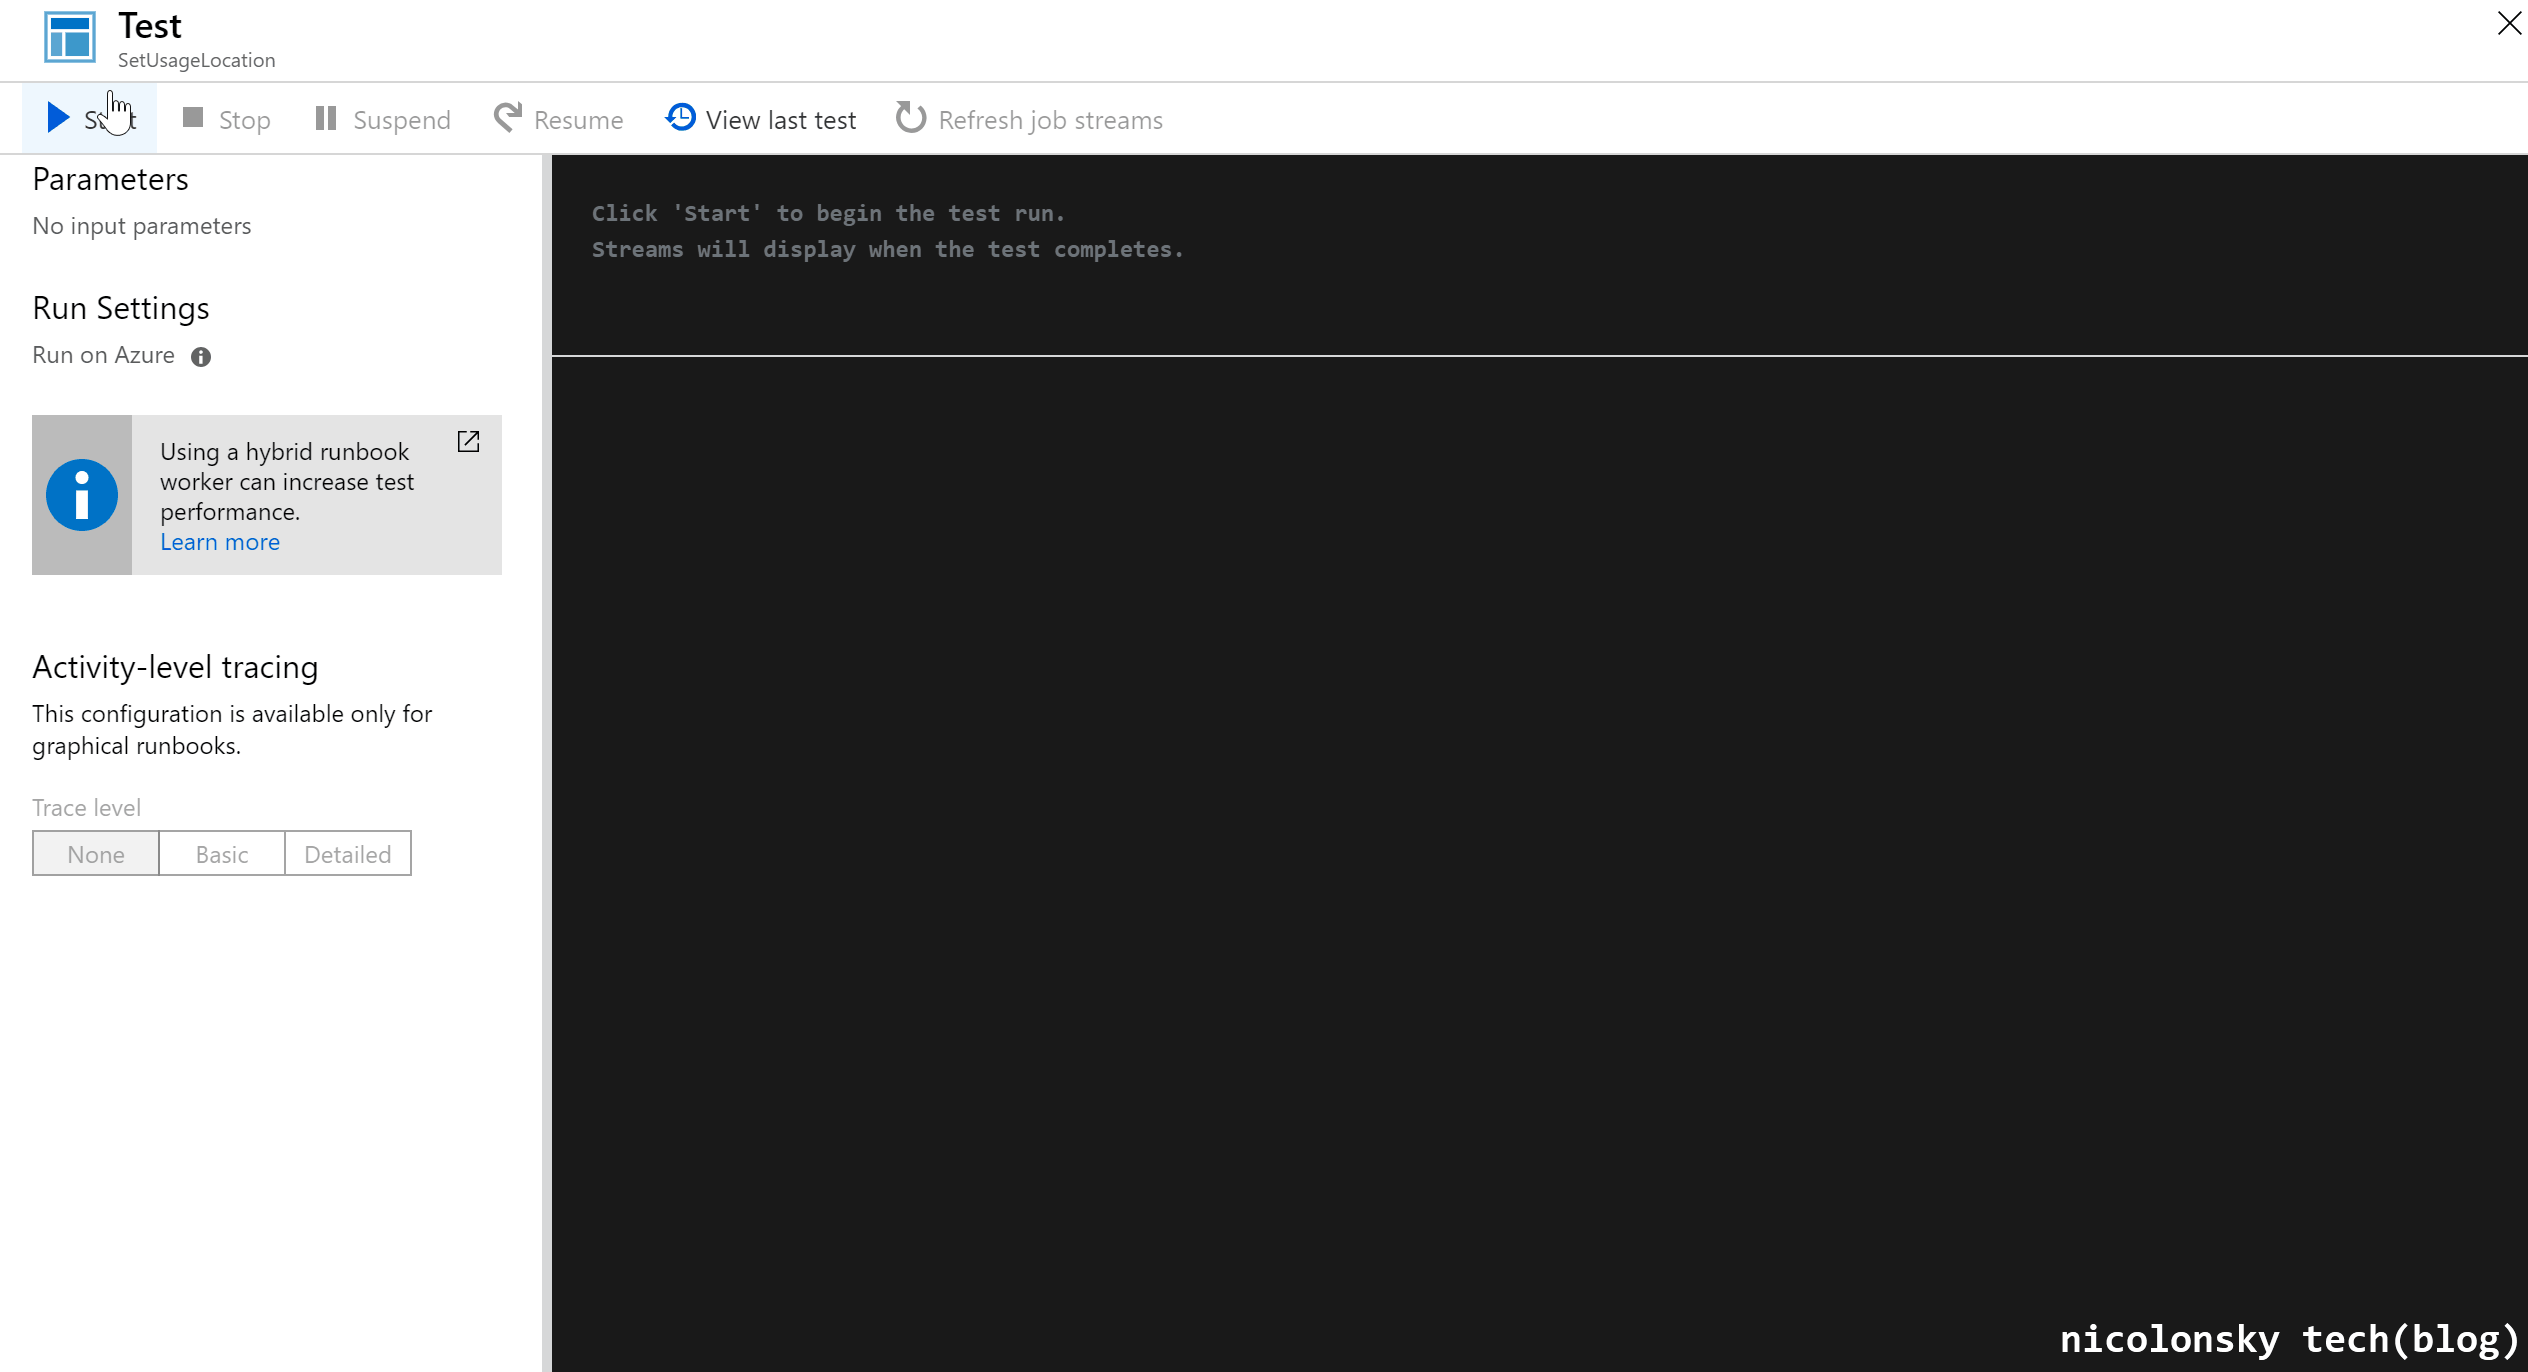
Happy runbook-ing.